Hello Internet! So its been a long time coming but Big Country Labs have decided to build a car!
We thought long and hard about what Chassis to build as we wanted something modern with plenty of aftermarket support and of course it had to be able to house a 1JZ or 2JZ engine swap. After trawling craigslist we found a Scion FRS rolling shell for sale (complete car, minus the engine and gearbox). So after talking with the seller and working out a price we snapped it up!

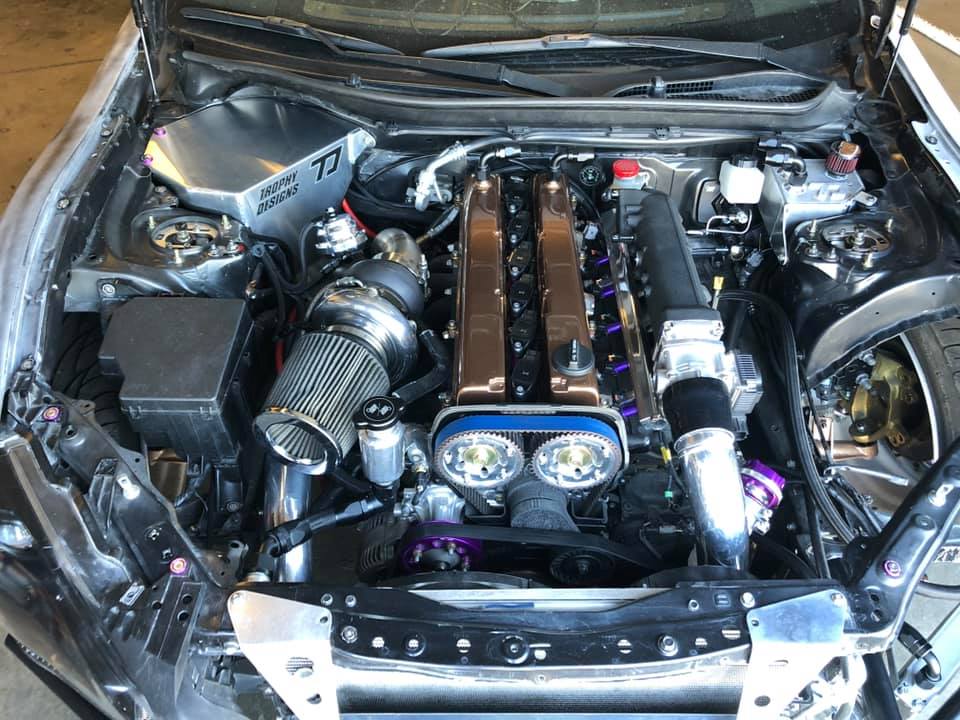
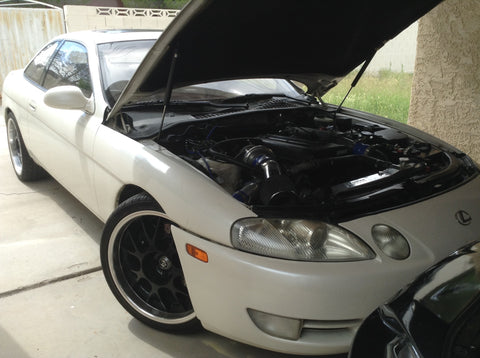
Now that we had acquired a chassis we needed to find the power plant. Being huge fans of the Toyota JZ engines and running them for years in drift and street cars we had to get another one! We turned to the internet again and found a complete running and driving Lexus SC300 with a 1JZGTE swap and R154 transmission. After talking with the selling we brought it and drove it away.
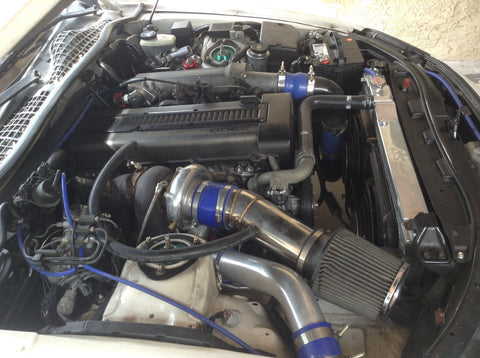
The SC300 had a ton of aftermarket parts including an aftermarket clutch kit, Single turbo kit, Stand Alone ECU, upgraded fuel system, front mount intercooler kit etc.
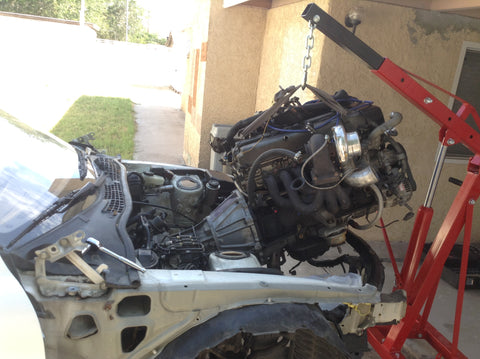
Being that the car was purchased for the purpose of ripping apart we got straight into it and removed the running gear. Before we did this we gave the Toyota 1JZGTE engine a quick compression check to confirm it was a winner.
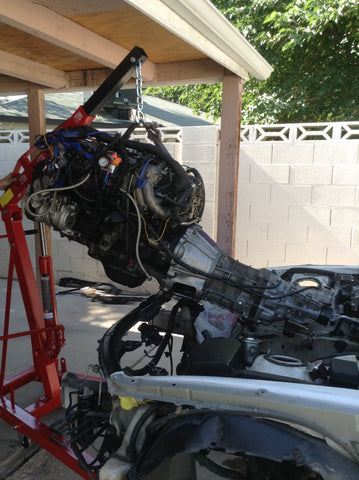
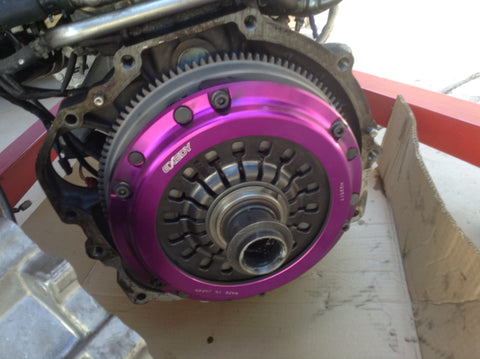
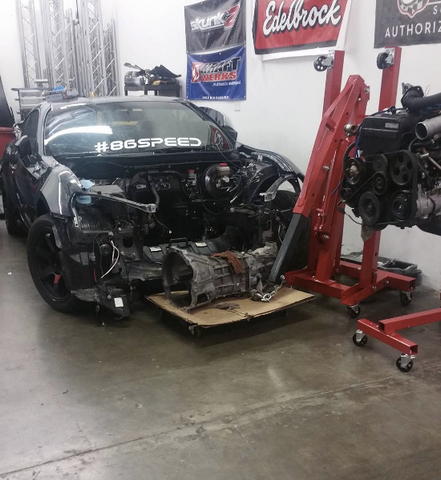
As soon as we got the engine and transmission out of the SC300 we cracked the box off to check out the clutch and check its condition.

We were very happy to see a Exedy hyper single in brand new condition!
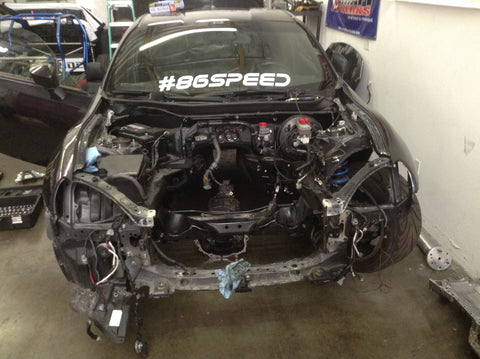
Now with the engine and transmission removed it was time to start stripping the chassis down. First the front end was stripped down so we could check clearance and see what will need cutting and what we can leave. As we plan to street drive this car we want to keep the cutting to a minimum and retain as many creature comforts as possible.
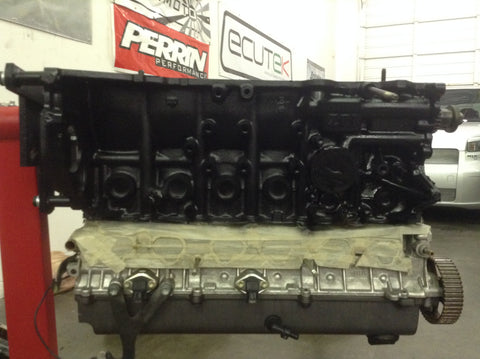
We also put the 1JZ engine on a stand so we can strip it down and swap the sump over to a Front sump so it will clear the front cross member.
On a recent trip to Portland we stopped by Xcessive Manufacturing and picked up a set of FRS / GT86 to 1JZGTE / 2JZGTE Motor mounts and brackets to suit our 1JZ non vvti engine. Having this off the shelf mounts will make mounting the engine nice and easy!

On inspection of the transmission tunnel and measuring the size of the R154 gearbox we are going to have to modify the stock tunnel mounts to fit the R154 in as the factory gear box is super small compared to the big Toyota R box.
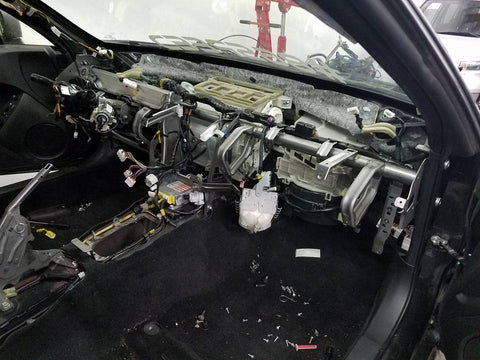
Next we removed the seats and dash (still need to do the carpet) so we can access the tunnel and wiring to make it easy for modification. Since we are welding on the transmissions tunnel we don't want anything to catch fire!
TIP: Make sure you use the correct E10 Torx Socket to undo the front seat bolts or you will more than likely strip them!
So with the 1JZ on a stand we removed the rear sump setup to make way for the front sump setup so it will clear the crossmember. While the engine is out and pulled down we decided to tape it up and paint the block in Black.

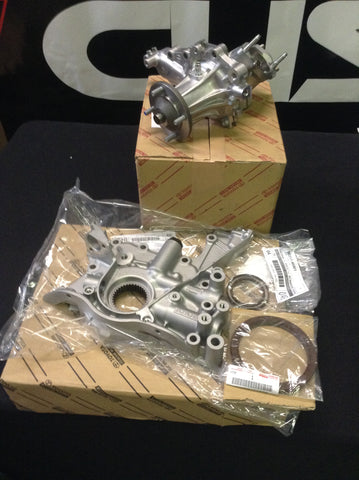
We ordered some new parts from Toyota so the JZ engine can be reliable when installed. We purchased a new water pump, oil pump, front and rear mail seals, O rings etc...
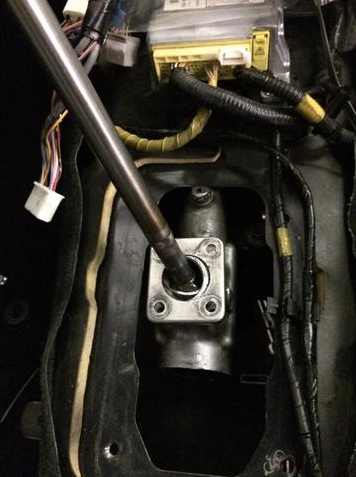
After fitting all the new parts to the engine it was time to look at the Transmission tunnel to see how the R154 gearbox will fit and what needed to be modified. The Scion FRS / Toyota GT86 / Subaru BRZ transmission tunnel has a brace for the factory gearbox crossmember which restricts the size of transmission that will bolt in without modification.

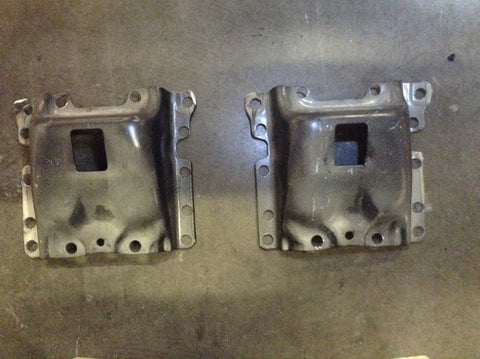
As you can see the factory gearbox mounting points on the FRS / GT86 / BRZ really take up a lot of room in the tunnel. So after doing a few measurements we confirmed it needed to be removed.
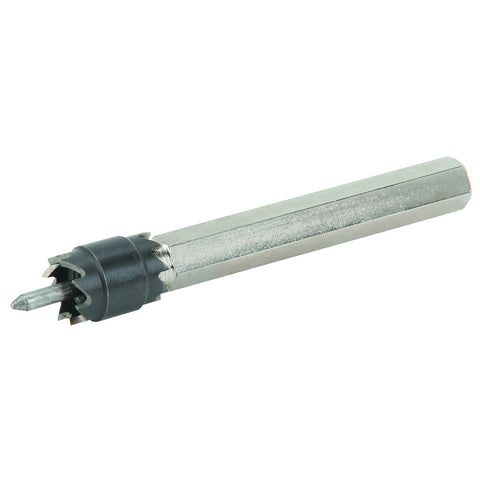
Instead of getting an angle grinder and cutting into the tunnel we went and purchased a Spot Weld Cutter and drilled out each of the spot welds holding that brace in place. The spot weld cutter essentially cuts around the spot weld making it easy to separate each panel with out making a mess.
TIP: Drill a small pilot hole so your spot weld cutting drill bit wont slip while starting the cut.
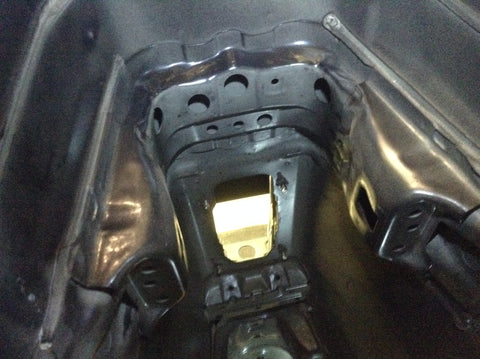
The OEM transmission tunnel cage brace is actually 3 pieces. We first drilled out the 2 actual mounting points to see if the gearbox would fit?
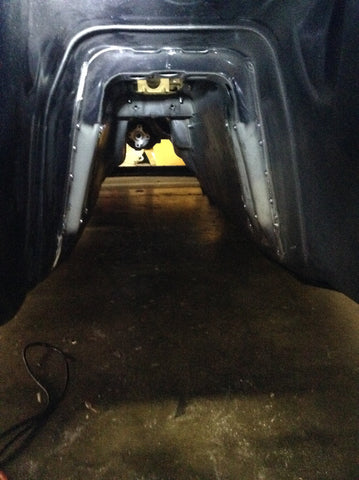
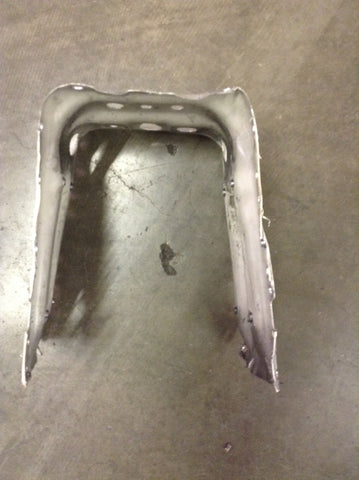
After removing these mounts we test fitted the gearbox in the tunnel, but it was still fouling on the transmission brace that was left. So once again we jumped under the car and started drilling out the remaining brace with the handy spot weld cutter. Here is what the brace looks like when removed. All up there was about 52 spot welds that needed to be drilled to remove the mounts and the cage brace.

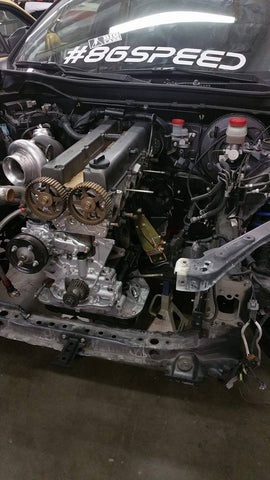
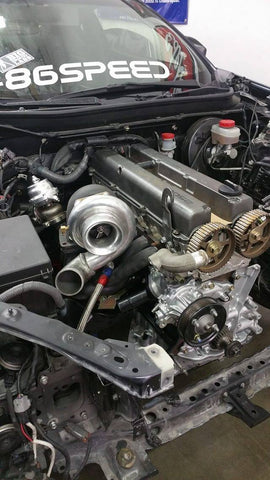
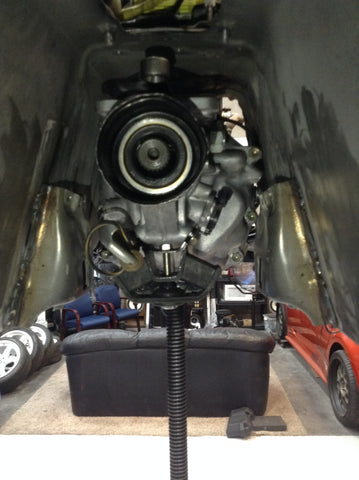
With the factory gearbox mounts and bracing out of the way, we bolted the transmission to the engine to trial fit in the bay to check if everything clears and fits.
After the modification the R154 gearbox fits in the FRS / GT86 / BRZ tunnel, Its still a tight fit but its in there. The factory FA20 engine and transmission setup in the Scion FRS / Toyota GT86 / Subaru BRZ is a very different shape to the 1JZGTE / 2JZGTE engine and the R154 gearbox as you can see from all the space above the gearbox.
1JZ just chillin the the engine bay. We trial fitted the turbo kit up and found out that everything will bolt on with no modification.

On the inside of the car we noticed that the transmission shifter didn't quite sit in the factory location. The shifter housing will need to be extended by about 2.5 inches in order to sit in the factory position.

Instead is extending the factory R154 shifter housing we used a JZX110 Chaser factory extended shifter which sits the gear knob in a close to factory position. The "110" shifter is known to be the smoothest shifter the Toyota R box was released with.

*The "110" extension does require a little modification if you have the old style R154 transmission like us. Only 2 of the 6 bolts line up so a couple bolt holes needed to be re tapped and also some tabs welded on and tapped so it all worked like factory.
As you can see its sitting pretty good in the OEM GT86 shifter hole now.
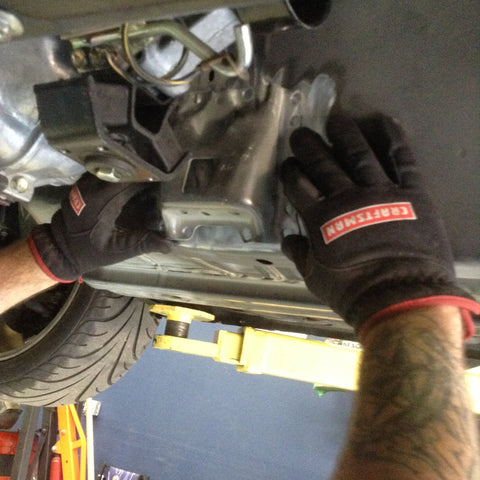
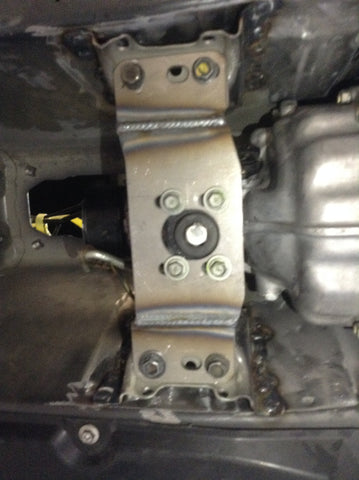
Now that we know the shifter and transmission fit we took the car down to Trophy Designs to help fabricate the gearbox cross member mounts. Since we wanted to keep this a street car we wanted them to look as factory as possible, so we decided to simply TIG weld the factory mounts back on in a new location.
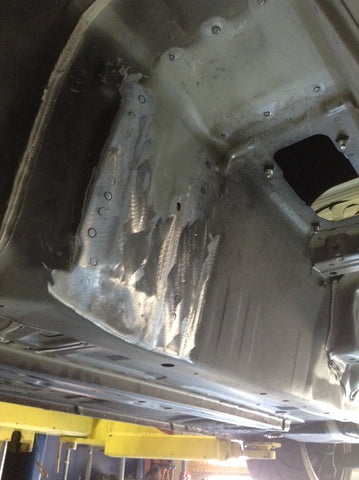
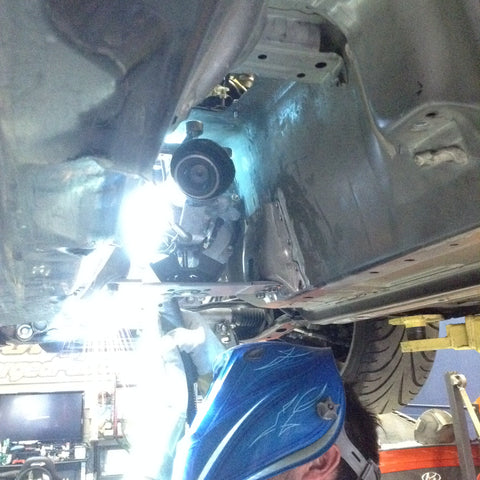
So we Sanded the paint down to give it a good clean up, Positioned the mounts where we wanted them and got to welding
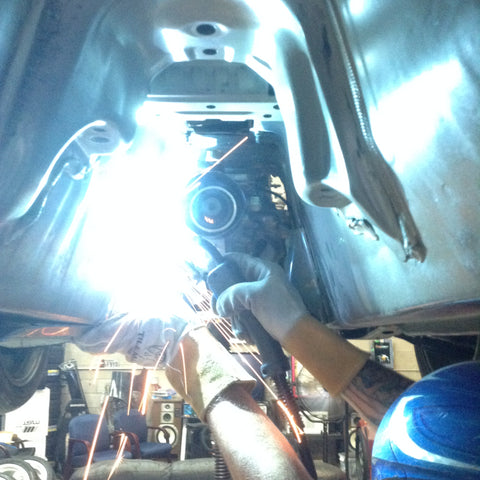
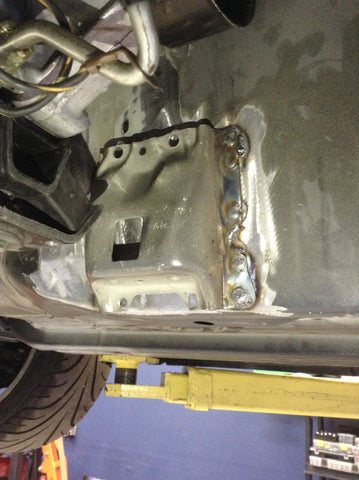
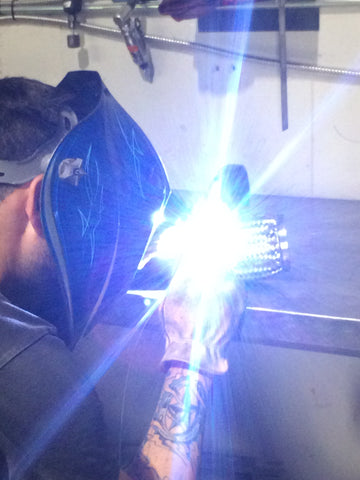
Being that the transmissions tunnel is thin sheet metal, an experienced TIG welder is essential to creating a neat finish and more importantly not blow any holes in the metal. Now its all looking nice and Factory, Next we made a crossmember to bolt the gearbox to our new mounts
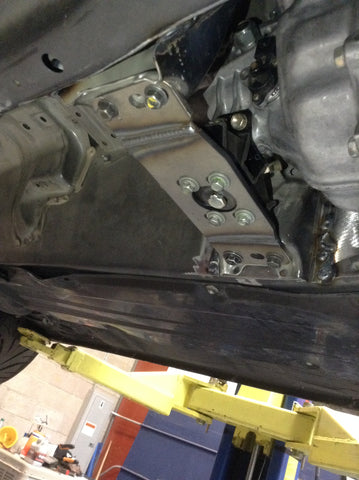

We actually used a crossmember that was already laser cut to suit a R154 into JZX chassis. We did this as the holes for the gearbox mount and mounts were already Laser cut and it was easy to cut up and weld the pieces to fit out setup.

We ordered a 3 inch aluminium drive shaft to suit after we were able to take measurements with everything test fitted.

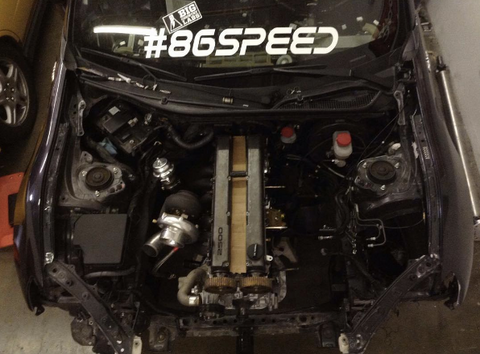
With the engine and gearbox now mounted it was time to start looking at how we could get the cooling system to fit and what parts were needed to keep this big motor cooling efficiently in a small engine bay. After measuring the space up front and comparing sizes of the factory radiator, it was pretty clear that the OEM unit was not going to cut the mustard.
With the radiator location being quite short / wide of an area we had to work with finding something to fit with the inlet and outlet in the location needed was probably going to be tricky.


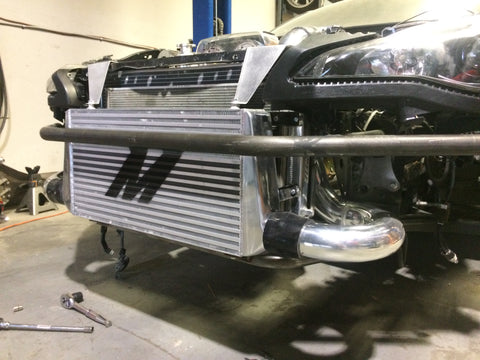
We found a Mishimoto unit - 16.5"x 30.8"dual pass 2-row race ally radiator actually fits almost perfectly into position with the inlet / outlet also in great spots when running it upside down. Pretty stoked as Its a pretty perfect size to do engine swaps in the 86 platform with Much more cooling capacity than the factory unit,

Mishimoto Intercooler core, Oil cooler core, Low temp thermostat were also picked up to handle the cooling duties.

The Mishimoto low temp 68 degree thermostat I run in all my JZs. It works so well to regulate temps to keep them low.

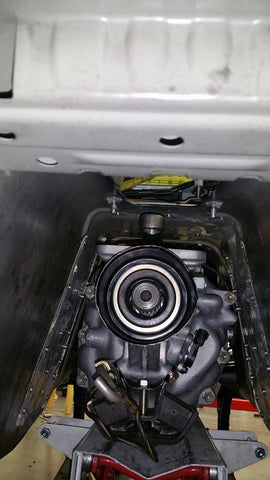
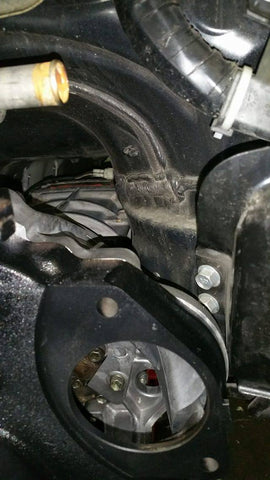
Now the engine is sitting in the bay one thing we needed to address is the harmonic balancer. The OEM item not only needed to go for preventative maintenance but it sat very close to the ribs on the lower radiator support. An ATI Racing super Damper was chosen as the diameter is smaller which clears the radiator support and it will handle what ever abuse could be thrown its way for the foreseeable future.

Needs to slide on a little further. If you have done this on a JZ with an ATI Balancer you will know. Something to research if you don't.

A much more comfortable amount of clearance to the lower support now.

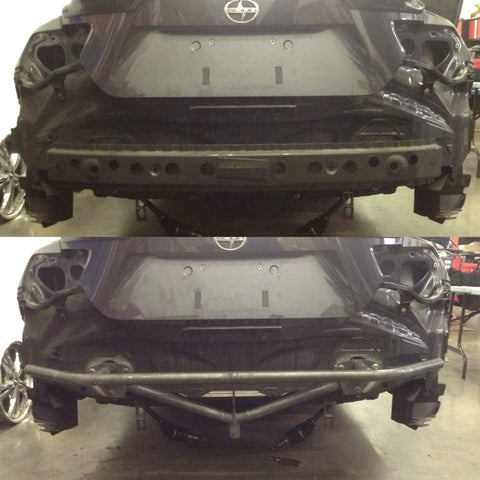
Both front and rear crash bars were replaced with some Drift Armor items. These are much nicer than the big bulky OEM items and Im sure a ton stronger plus having a jacking point in the rear so accessible is very handy.

A set of Weds Cerberus 2 came up in 18x9.5 +15 5x100 squared for sale and we knew we needed something with a little JDM flavour on this car so we of course brought them....


Now that some wheels were sorted for the car and we knew the direction we wanted to take aero / style, The T & E Vertex Lip Kit caught our attention. A little more aggressive but keeping the factory lines. After a chat with the Lads at Vertex we had a kit made and shipped out in the next container from Japan to Vertex USA for us.

Whoops Blurry pic


Still need to fit the rear pods but pretty happy how it looks, and it fits like a glove!


Needed to put a wing on it! With the subtle street style in mind we use the Cup Cake low mount 1700mm Carbon kit with XL end plates.


Back in the engine bay - We needed to decide if we would retain the OEM cable driven throttle body or try and adapt something drive by wire so we can use the factory DBW accelerator pedal. With DBW and modern tuning technology we thought this was the way to go in a modern chassis and keeping in mind our goal is to have street car and to cut as little steel from the body as possible.
We did some research and found the Nissan VQ throttle body was cheap, easy to find and pretty close to the same size as the opening on the 1JZ intake manifold. Our Buddy at Sleeper Designs came up with a adapter for the TB to make it direct bolt on.
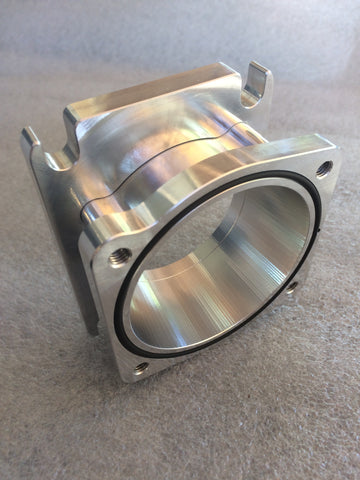
Super cool piece, O ringed on both sides so no gaskets are needed. This is also tapered perfectly from the couple mm larger VQ body to the 1JZ intake manifold. Is this something we should make more of and sell? Email us if you think so?


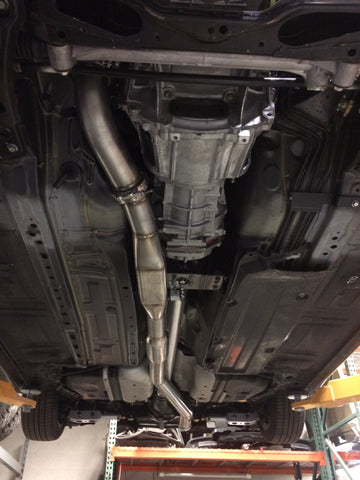
With the Throttle body in place it was time for fabrication to start. First up was the exhaust. We had our Mate Chris from Trophy Designs Tig weld a 3 inch stainless turbo back system.


Flex pipe was added.

Looks slick from up top!

We ran into some ground clearance issues around the gearbox cross member as we couldn't tuck the exhaust up high enough. So we brought some 3" Oval pipe and made it tuck up as tight as possible.

A small inline muffler was fitted to take a little rasp our of the note.
A 4 inch Blast pipe style rear exit was fabricated. Looks pretty kick ass!


An Apexi N1 muffler setup with interchangeable V bend was also made for the times when you want to cruse around with a little less attention.


One thing I really wanted was a swirl pot on this motor. So I brought a universal style one online and we cut it to size, removed the fittings etc and scalloped it along with cutting down the stock 1JZ water neck. A skilled welder makes it look all so easy. All welded up water tight with a AN16 fitting on the bottom.


This, then this, etc


Mount the Radiator, Intercooler and the AC condenser since its a street car after all!


Intercooler pipes up next. We picked up a universal 2.75" pipe kit to cut up.


The tabs were trimmed from the front bumper cover for the factory grill and slightly cut the opening to fit the intercooler pipes.


Before we left the Fab shop we trimmed the front frame rails down for wheel clearance. A template was taken and then plated up.


The fuel system was the next thing we looked at. We had a goal of 500hp at the wheels in mind with this build so need sufficient fuel to get us there. A set of 1050X Injector Dynamics 14mm Injectors were purchased along with the Radium drop in Fuel hanger setup. This holds 2 Walbro 450L E85 capable fuel pumps and will allow for a return line back into the tank from the engine. We also picked up the Radium fuel hanger plumbing kit as it fits up really well under the car to stay quite hidden. Kit includes the regulator, brackets, Fuel filter, -8 feed, -6 return lines etc.

I love these purple tops! We decided to run a Dead end style rail to keep the bay a little cleaner. Since the radium fuel regulator regulates the return system we were able to do this. Looks pretty cool I think.

Setting up the Radium Hanger was the next task. You can buy the hanger with the pumps already installed now.


No photos were taken when removing the factory pump setup. You can see the bucket now inside the FRS fuel tank.

You basically have to drop the pump hanger into the bucket and hope its in the correct position as you obviously cant look into the tank to check. Line it up and drop it in place then screw the OEM locking ring back over to secure it.


The AN8 PTFE feed line was ran to the front of the car along with the AN6 return line. Since the FRS does not run a return to the tank from factory this hanger makes that issue easy to manage. Sufficient wiring needed to handle the load was ran from the pumps up towards the dash.